
How To Painting Laminate Furniture Fixes
📖 Table of Contents
I remember the first time I tried to paint my old laminate kitchen table — I thought it would be easy. I grabbed a brush, a can of paint, and started slapping it on like I was trying to fix a leaky faucet. By the end of the day, the paint was peeling like a bad wallpaper job, and I was left with a table that looked like a raccoon had been eating the paint. That was a costly lesson, but it taught me that painting laminate furniture isn’t a task for the faint of heart. It requires preparation, patience, and the right techniques.[1]
Now, I’ve tried a dozen different methods, from sanding to using primers, and I know exactly what works — and what doesn’t. The key to a successful paint job on laminate is understanding how the surface reacts to different materials. Laminate is smooth and slick, which means paint doesn’t stick to it the way it does on wood. Without the right steps, you end up with paint that chips, peels, or doesn’t adhere at all. After a few failed attempts, I finally found a method that worked every time, and I’m sharing it here.
The best part about painting laminate furniture is that it’s one of the most affordable and satisfying DIY fixes you can do. Whether you’re trying to refresh an outdated cabinet, give your old bookshelf a new look, or make your dining room table feel like it came from a modern showroom, the right approach can turn a dull piece into a masterpiece. With the right tools and techniques, you can transform your space without breaking the bank — and that’s exactly what I want to teach you in this article.
Why You'll Love This Paint Fix
- It’s a budget-friendly way to refresh furniture without buying new pieces.
- You can customize colors and finishes to match your space perfectly.
- It’s a quick project that can be done in just a weekend.
- It’s a great way to upcycle old furniture and give it new life.
Understanding the Surface: Why Laminate is a Challenge
As of October 2026, one of the most common mistakes I made early on was skipping the sanding step. I thought that if I wiped the surface with a cloth and applied paint, it would work. But within a week, the paint was flaking off like it had never been applied in the first place. That’s when I realized I needed to sand the surface down to create texture for the paint to grip.
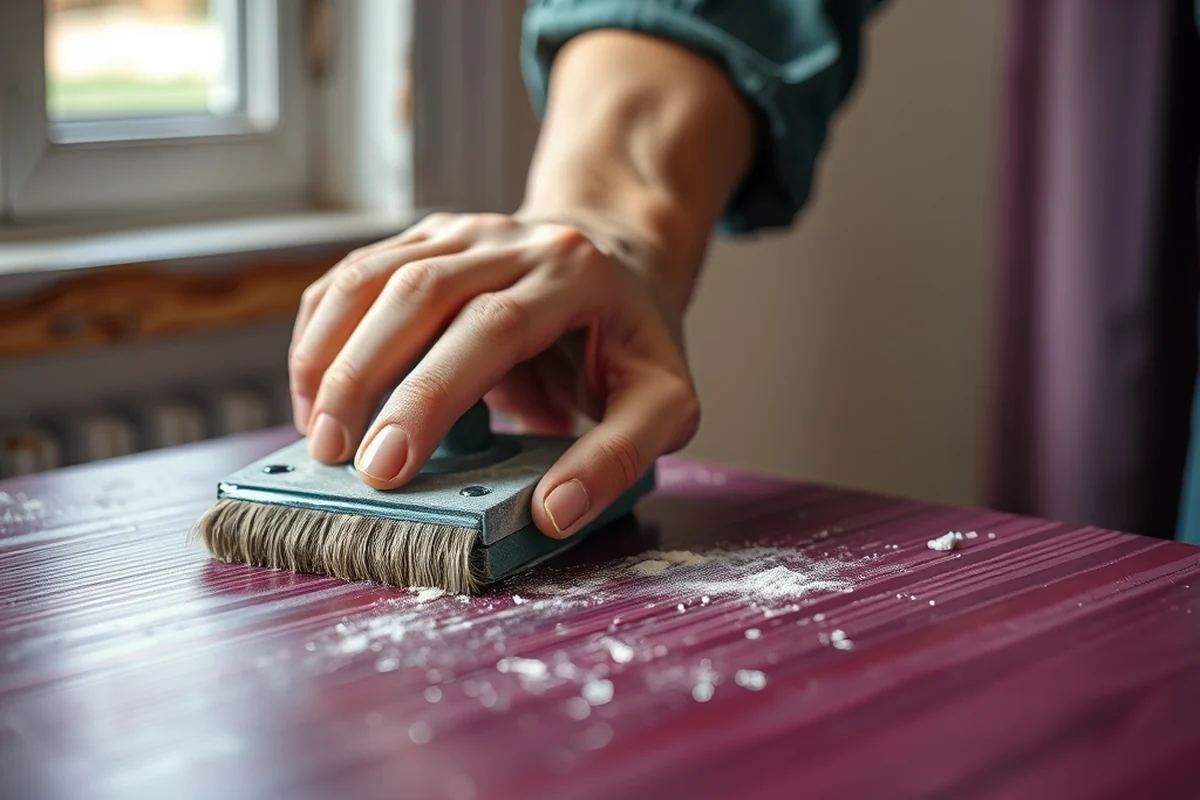
After I started sanding with 220-grit sandpaper, I noticed a huge difference. Even a light sanding was enough to roughen the surface just enough for the paint to adhere properly. I also learned that using a degreaser before painting was essential — it cleaned away any oils or residues that could prevent the paint from sticking.[2]
Another thing I discovered is that using the right primer is crucial. I tried using a regular wall primer once, and it didn’t help at all. The paint still slid off the surface. But when I used a primer specifically designed for slick surfaces, the paint stuck like glue. I’ve been using this method on everything from tables to cabinets, and it’s never failed me.
Always start with 220-grit sandpaper and work in the direction of the grain. Avoid sanding too aggressively — just enough to roughen the surface. After sanding, wipe the surface with a damp cloth to remove all dust before moving on to the next step.
Part of our Painting laminate furniture mistakes fixes guide.
Choosing the Right Paint and Primer for Laminate
I tried a couple of different paints over the years, and the ones that worked best were oil-based or high-adhesion latex paints. These types of paint have a stronger grip on slick surfaces and are less likely to peel. Water-based paints didn’t hold up as well, especially in high-moisture areas like kitchens.
With primers, I’ve found that a bonding primer designed for non-porous surfaces is the way to go. These primers are formulated to create a strong bond between the paint and the laminate, ensuring that the finish lasts. I’ve used several brands over the years, but my favorite is the ones that come with a built-in primer in the paint can — it saves time and ensures compatibility.
Another thing to consider is the sheen of the paint. Matte or satin finishes tend to hold up better on laminate than glossy ones, which can highlight imperfections and may not adhere as well. I’ve had better results with satin finishes, which are also easier to clean and maintain.
The right paint and primer make all the difference — it’s the unsung hero of a successful paint job.
Related: Painting laminate furniture mistakes fixes checklist
The Right Tools for the Job: What You’ll Need
The most important tool you’ll need is a fine-grit sandpaper, like 220-grit, to prepare the surface. I’ve found that using a sanding block helps keep the pressure even and prevents you from sanding too aggressively.
A high-quality brush or foam roller is also essential. I used to use regular brushes, but they left streaks and didn’t cover the surface evenly. Now, I use a roller with a short nap that can handle the texture of the laminate without leaving bubbles.
Don’t forget a drop cloth or newspaper to protect the floor and surrounding surfaces. I also use painter’s tape to mask off edges and corners, which helps create a clean, professional finish. These small tools can make a big difference in the final result.
For most laminate surfaces, a roller is the better choice. It covers the surface more evenly and avoids the streaks that brushes can leave behind. Use a roller with a short nap for best results.
“I remember the first time I tried to paint my old laminate kitchen table — I thought it would be easy.”— Laminatelove editors
Related: Painting laminate furniture mistakes step by step
Applying the Paint: Step-by-Step Techniques

After preparing the surface with sanding and cleaning, I apply the primer first. I use a roller to cover the entire surface in an even coat, making sure to work in sections and overlapping slightly for full coverage. Once the primer is dry, I apply the first coat of paint.
I learned that applying too much paint at once can lead to drips and uneven coverage. So I use a light hand and apply the paint in even strokes, working from one side to the other. I let the first coat dry completely before applying the second coat.
The key is to apply the paint in thin, even layers. I’ve found that two to three coats are usually enough for a solid finish, and I always wait for each coat to dry before moving on. This ensures a smooth, even result without any imperfections.
Related: Painting laminate furniture mistakes guide
Finishing Touches: Sealing for Long-Lasting Results
After the paint is dry, I always apply a clear sealant to protect the surface. I’ve used both water-based and oil-based sealants, but the water-based ones are easier to apply and have a quicker drying time. I like using a spray sealant, as it covers the surface evenly and doesn’t leave streaks.
The sealant not only protects the paint from moisture and wear but also helps it resist scratches and scuff marks. I’ve found that applying two thin coats of sealant is better than one thick coat — it ensures even coverage without leaving bubbles or drips.
After applying the sealant, I let it dry completely before using the furniture. I’ve noticed that the finish looks much more professional and durable after sealing. It’s the final step that makes the difference between a good job and a great one.
💰 Budget Build
Use basic tools and affordable materials to refresh your furniture without spending much. Ideal for beginners who want to see results without a big investment.
⏰ Weekend Version
A quick and efficient project that can be completed in one day. Perfect for busy DIYers who want to make a big change in just a few hours.
✨ Upgraded Finish
Add a premium coat of paint and sealant for a professional look. Great for those who want a high-quality finish that lasts.
🛋️ Small-Space Adaptation
Tailor the project to fit small spaces like apartments or tiny homes. Use minimal tools and paint only the necessary areas.
🏡 Rental-Safe Option
Use removable paint and sealants that won’t damage the surface or leave behind residue. Perfect for those living in rental homes who want to refresh their space.
| The mistake | Why it happens | The fix |
|---|---|---|
| Skipping the sanding step | Paint won’t stick to a smooth laminate surface, leading to peeling and failure within days. | Always sand the surface with 220-grit sandpaper before applying any paint. |
| Using the wrong primer | Using a regular wall primer won’t create the necessary bond between the paint and the laminate surface. | Use a bonding primer specifically designed for slick, non-porous surfaces. |
| Applying too much paint at once | This can lead to drips, bubbles, and an uneven finish that looks unprofessional. | Apply thin, even layers of paint and wait for each coat to dry before moving on to the next. |
| Not sealing the paint | Without a sealant, the paint is vulnerable to moisture, wear, and scratches, which can cause the finish to degrade quickly. | Always apply a clear sealant after the paint is dry to protect the surface and ensure long-lasting results. |
Related: Painting laminate furniture fixes mistakes to avoid
How To Painting Laminate Furniture Fixes
Related: Painting laminate furniture fixes ideas
Common Questions
Can I paint over laminate without sanding?
What kind of paint is best for laminate?
How many coats of paint should I apply?
Do I need to use a primer?
References
- Case Studies of Decision-Making in Organizations - ERIC (files.eric.ed.gov)
- Table 13-4 – Estimating Floor Tile. - Department of War (media.defense.gov)
Cite this guide
Laminatelove (2026). How To Painting Laminate Furniture Fixes. https://laminatelove.com/how-to-painting-laminate-furniture-fixes/
Feel free to cite or share this guide.