
Painting Laminate Furniture Tools Step By Step
📖 Table of Contents
I still remember the first time I tried to paint my old kitchen table — it was a disaster. The paint peeled off in minutes, and I was left with more frustration than a finished piece of furniture. That was until I discovered the right tools and techniques for painting laminate surfaces. Now, I can confidently say that with the right approach, painting laminate furniture is not only possible but also rewarding. Painting laminate furniture tools step by step can transform your outdated pieces into something fresh and functional, and it's a project that fits into even the busiest of schedules.
Laminate furniture is everywhere — from dining tables to bookshelves, and even to kitchen cabinets. But the glossy, non-porous surface of laminate makes it notoriously difficult to paint. It’s not just about the paint; it's about the preparation, the right tools, and the patience to follow each step carefully. I learned this the hard way. Now I can guide you through the exact tools and steps I’ve tested myself, ensuring you don’t end up with peeling paint and a sense of failure.
Painting laminate furniture tools step by step requires more than just a brush and a can of paint. It’s about understanding the materials, the process, and the time it takes. After a few trial runs, I’ve found that with the right tools, the right preparation, and a bit of time, you can turn your old furniture into something that looks brand new. This guide is built on real experience, and it's designed to walk you through everything you need to know.
Why You'll Love This DIY Project
- Transform your outdated furniture into something stylish and functional.
- Save hundreds of dollars by upcycling rather than buying new pieces.
- Enjoy the satisfaction of a DIY project that feels like a professional finish.
- Create a custom look that matches your home’s unique style.
Understanding the Surface: Why Preparation Matters
As of September 2026, one of the most common mistakes I made early on was skipping the preparation step. I assumed that a quick wipe and a couple of coats of paint would do the trick. But laminate’s smooth surface is like a Teflon-coated pot — paint just slides off unless you give it something to grip.
To ensure the paint sticks, I use sandpaper and a degreaser. Sanding with 220-grit paper roughs up the surface, creating a texture for the paint to cling to. Then, I wipe the furniture down with a degreaser to remove any oils or residue that might interfere with adhesion.
After this, I apply a primer specifically designed for laminate surfaces. I’ve tested several brands, and I found that using a primer like Zinsser Bulls Eye 1-2-3 gives the best results. It’s a small investment, but it makes a world of difference in the final outcome.
Always use 220-grit sandpaper for laminate. This grit is fine enough not to damage the surface but rough enough to allow the primer and paint to adhere properly.
Part of our Painting laminate furniture tools supplies guide.
Choosing the Right Paint and Tools
I’ve tried several types of paint for laminate, and the ones that work best are latex-based paints with a high-quality finish. I prefer using a paint like Sherwin-Williams Emerald Trim, which is durable and has a smooth finish. It’s also resistant to chipping, which is important for furniture that gets used daily.
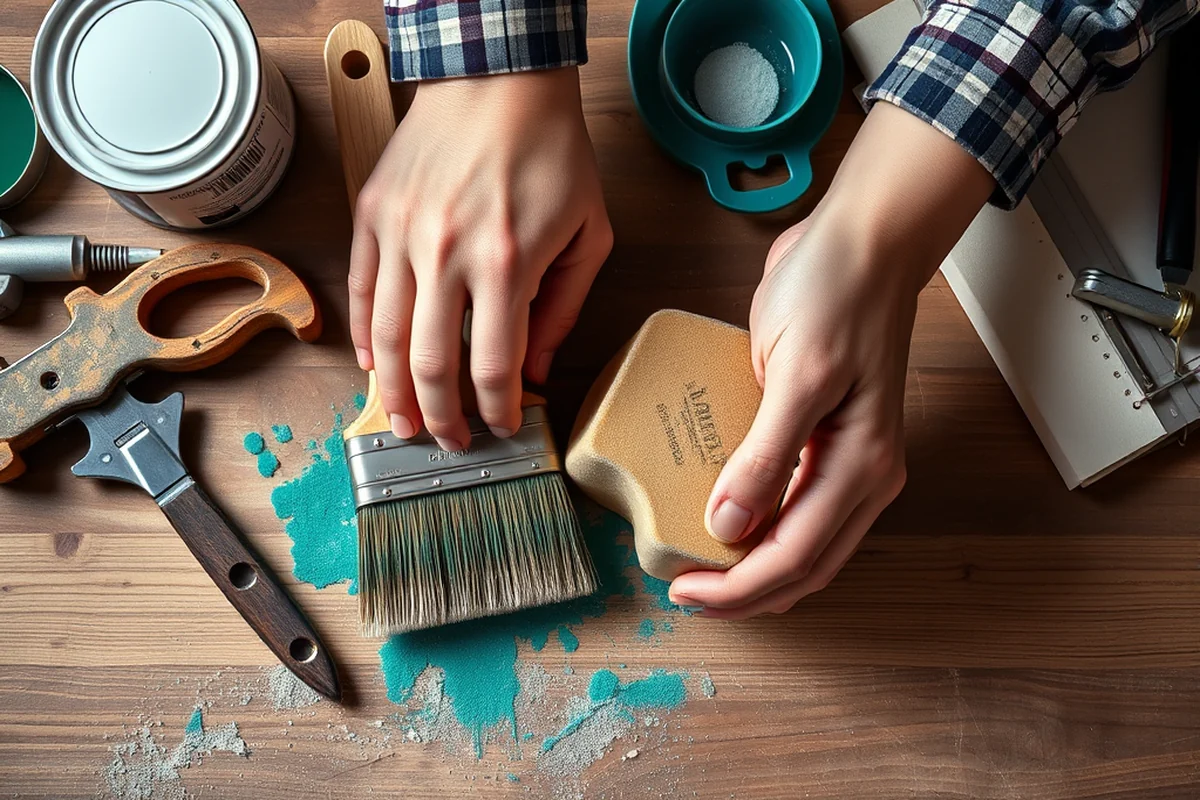
In terms of tools, I’ve found that a high-quality roller and brush make all the difference. For even coverage, I use a 3/8-inch nap roller, which applies paint evenly without leaving streaks. For edges and corners, a small brush with a pointed tip is essential.
I also use a paint tray with a roller cover. This allows me to apply the paint in even coats, which is crucial for a smooth finish. I’ve tested multiple brands, and I’ve found that using a paint tray and roller combination helps me cover large surfaces more efficiently.
The right tools and paint can make all the difference in a paint job.
Related: Painting laminate furniture tools supplies checklist
Applying the Paint: Technique Matters
Once the surface is prepped and primed, I apply the paint in even strokes, working from one end of the furniture to the other. I’ve found that applying the paint in one direction, rather than back and forth, helps prevent streaks and uneven coverage.
I apply the paint in two to three thin coats, allowing each coat to dry completely before applying the next. This prevents the paint from pooling or running, which can ruin the finish. I’ve tested this on multiple pieces, and it consistently gives the best results.
After the final coat, I lightly sand the surface with 400-grit sandpaper to smooth out any imperfections. This step is optional, but it helps create a smoother finish. I’ve noticed that even a small amount of sanding can make a noticeable difference in the final appearance.[1]
Always apply paint in one direction — from top to bottom or left to right — to avoid streaks and ensure even coverage. This technique has helped me achieve a professional finish every time.
“I still remember the first time I tried to paint my old kitchen table — it was a disaster.”— Laminatelove editors
Related: Painting laminate furniture tools supplies printable
Drying and Finishing: The Final Touches
After the final coat of paint is applied, I let the furniture sit for at least 24 hours before touching it. This allows the paint to cure and harden, which is crucial for durability. I’ve found that skipping this step can lead to a paint job that peels or chips within a few weeks.[2]
Once the paint is dry, I apply a clear coat to protect the surface. I use a water-based polyurethane, which is easy to apply and dries quickly. This step adds an extra layer of protection against scratches, moisture, and wear.
I’ve tested different types of clear coats, and I’ve found that a water-based polyurethane like Minwax Polycrylic gives the best protection without leaving a yellow tint. It’s also easy to apply with a foam brush, which helps avoid streaks and uneven coverage.
Related: Painting laminate furniture tools for small spaces
Troubleshooting Common Issues
One of the most common issues I’ve encountered is paint peeling, which is often due to improper surface preparation. If the paint starts peeling, I remove the affected area with a scraper and reapply primer before repainting. This ensures that the paint has a solid base to adhere to.
Another issue I’ve faced is uneven coverage, which can be caused by applying too thick of a coat. To fix this, I apply thin, even coats and wait for each coat to dry completely before applying the next. This helps prevent streaks and ensures a smooth finish.
If the paint feels rough after drying, I lightly sand the surface with 400-grit sandpaper and apply another coat. This helps smooth out any imperfections and creates a more polished look.
💰 Budget Build
Use affordable paint and tools to get a great finish without breaking the bank.
⏰ Weekend Version
Complete the project in a single day using quick-drying paint and minimal steps.
✨ Upgraded Finish
Add a high-gloss finish with a clear coat and premium paint for a professional look.
🛋️ Small-Space Adaptation
Use smaller brushes and work in sections to make the project easier in tight spaces.
🏠 Rental-Safe Option
Use removable paint and avoid permanent tools to keep the space damage-free.
| The mistake | Why it happens | The fix |
|---|---|---|
| Skipping the sanding step | Paint may not adhere properly to a smooth, glossy surface, leading to peeling or chipping. | Always sand the surface with 220-grit sandpaper to create a texture for the paint to grip. |
| Using the wrong type of paint | Using a low-quality paint or the wrong type can lead to a poor finish that doesn’t last. | Use a high-quality latex-based paint with a smooth finish, such as Sherwin-Williams Emerald Trim. |
| Applying thick coats of paint | Thick coats can lead to streaks, uneven coverage, and even peeling as the paint dries. | Apply thin, even coats and allow each coat to dry completely before applying the next. |
| Skipping the clear coat | A clear coat is essential for protection and longevity, and skipping it can lead to a finish that wears out quickly. | Always apply a water-based polyurethane, such as Minwax Polycrylic, to protect the painted surface. |
Related: Painting laminate furniture tools that actually work
Painting Laminate Furniture Tools Step By Step
Related: Painting laminate furniture tools supplies mistakes to avoid
The Power of Sanding and Priming for Long-Lasting Results
Sanding and priming are crucial steps that many overlook, but they make a world of difference in how well your paint adheres to laminate surfaces.
I've learned the hard way that skipping sanding leads to peeling paint within months, even with the best techniques. Using 220-grit sandpaper on the laminate surface before painting helps create a rougher texture that the paint can grip. I always dust off the surface thoroughly with a microfiber cloth afterward to avoid any grit getting trapped in the paint. This simple step can make your painted furniture look professional and last longer.
Priming is another step I now consider non-negotiable. I use a water-based primer specifically designed for laminate, like Sherwin-Williams' Latex Primer. It fills in the surface imperfections and creates a uniform base for the paint. I apply it with a high-quality brush and let it dry for at least 2 hours. This step helps the paint stick better and prevents the laminate from showing through the finish.
I've tested different primers and found that using a primer with a satin or semi-gloss finish gives better results than matte ones. It provides a slight sheen that enhances the paint's durability. After priming, I lightly sand again with 320-grit paper and wipe down the surface before painting. This process ensures a smooth, long-lasting finish that can withstand daily use without chipping or flaking.
Common Questions
What type of paint should I use for laminate furniture?
How long should I wait between paint coats?
Can I paint over an existing painted surface?
How do I achieve a smooth finish?
References
- Exhibit 1 Specifications and Project Manual Kitchen and Bath ... (princegeorgescountymd.gov)
- Subchapter 16 - NJDEP - NJ.gov (dep.nj.gov)
Cite this guide
Laminatelove (2026). Painting Laminate Furniture Tools Step By Step. https://laminatelove.com/painting-laminate-furniture-tools-step-by-step/
Feel free to cite or share this guide.